If you’ve been searching for step by step MATLAB tutorials, get ready—because this guide will take you from absolute beginner to confident user in a smooth, conversational, and thoroughly explained way.
My goal here is to make MATLAB feel easy, logical, and fun, even if you’re learning it for the first time.
1. Introduction to MATLAB
MATLAB (short for Matrix Laboratory) is a high-level programming language designed mainly for:
- Engineering
- Mathematics
- Data science
- Machine learning
- Simulation
- Signal processing
- Robotics
- Academic research
What makes MATLAB special—especially for beginners—is its simplicity. Unlike many programming languages where you need multiple steps just to display a message, MATLAB lets you type and instantly see results.
Think of MATLAB as a calculator on steroids—fast, visual, and packed with ready-made tools.
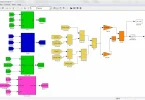
2. Understanding the MATLAB Interface (Your Control Room)
Before writing code, let’s understand where you’ll be working. When MATLAB opens, you’ll see:
a) Command Window
This is where you enter quick commands that run immediately. Perfect for testing ideas.
b) Workspace
Shows all the variables you’ve created. Great for tracking data.
c) Command History
Displays the commands you previously ran.
d) Current Folder
Shows the files in your working directory.
e) Editor
Where you write longer scripts and functions for saved programs.
Understanding this layout makes your workflow smoother because you know exactly where things happen.
3. Step 1: Running Your First Commands
Let’s start with something simple so you get comfortable.
Type this in the Command Window:
2 + 3
You’ll instantly see:
ans = 5
Now try:
sqrt(25)
Which returns:
5
With just a command or two, you’re already using MATLAB as a math tool.
4. Step 2: Creating and Using Variables
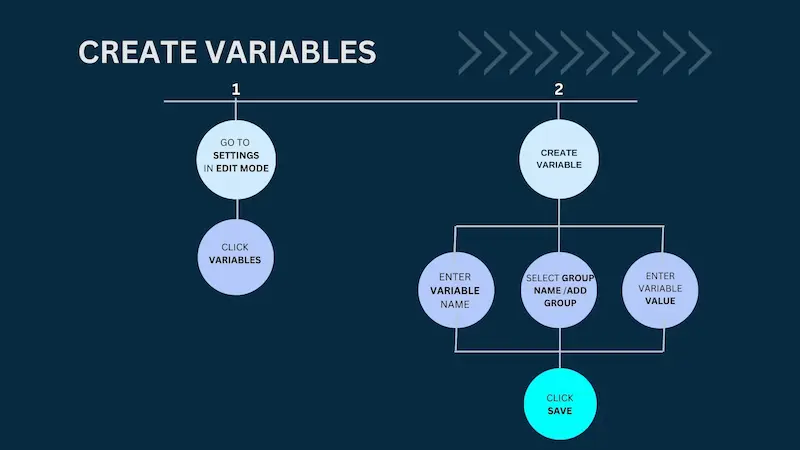
Variables help you store values. MATLAB makes this extremely easy.
Examples:
x = 10
y = 20
z = x + y
MATLAB automatically stores the value of z in the Workspace as:
z = 30
Important:
MATLAB is case-sensitive.
Value and value are not the same variable.
5. Step 3: Working with Arrays and Matrices
MATLAB is a matrix-based language, so let’s get comfortable with arrays.
Row vector:
r = [1 2 3 4]
Column vector:
c = [1; 2; 3; 4]
Matrix:
A = [1 2; 3 4]
Matrix Addition:
B = [5 6; 7 8]
C = A + B
Matrix Multiplication:
D = A * B
If you’re studying linear algebra, this is where MATLAB becomes incredibly powerful.
You may also like to read this:
Beginner MATLAB Tutorial Guide – Learn MATLAB Step By Step
MATLAB Coding Tips For Beginners – Complete Starter Guide
Practical MATLAB Programming Examples Explained Easily
Easy MATLAB Project Tutorials For Beginners Step By Step
6. Step 4: Creating MATLAB Scripts (Your First Program)
If you want to store multiple lines of code, use a script.
Steps:
- Go to Home → New Script
- Type the following:
a = 5;
b = 8;
c = a + b;
disp([‘The result is: ‘, num2str(c)]);
- Save it as myFirstScript.m
- Click Run
Output:
The result is: 13
Scripts are the foundation of longer MATLAB programs.
7. Step 5: Writing Functions (Reusable Code)
Functions allow you to reuse logic. You write them in separate files.
Try this:
function result = squareNumber(n)
result = n^2;
end
Save this file as squareNumber.m.
Now run:
squareNumber(7)
Output:
49
You just wrote your first MATLAB function!
8. Step 6: Conditionals (Making Decisions in Code)
Conditional statements help your code make choices.
Example:
x = 15;
if x > 10
disp(‘The number is greater than 10’);
elseif x == 10
disp(‘The number is exactly 10’);
else
disp(‘The number is less than 10’);
end
This is extremely useful in logical operations and simulations.
9. Step 7: Loops (Repeating Tasks Automatically)
FOR Loop
Runs a fixed number of times.
for i = 1:5
disp([‘Iteration: ‘, num2str(i)]);
end
WHILE Loop
Runs until a condition is met.
x = 1;
while x <= 5
disp([‘Value: ‘, num2str(x)]);
x = x + 1;
end
Loops are essential when working with big datasets or simulations.
10. Step 8: Plotting Graphs (MATLAB’s Superpower)
This is where MATLAB shines visually.
Plot a simple graph:
x = 0:0.1:10;
y = sin(x);
plot(x, y);
title(‘Sine Wave’);
xlabel(‘x’);
ylabel(‘sin(x)’);
You’ll instantly see a smooth sine curve.
No complicated settings, no graphics libraries—just beautiful plots.
11. Step 9: Importing and Exporting Data
MATLAB makes reading files simple.
Import CSV file:
data = readtable(‘mydata.csv’);
Preview data:
head(data)
Export data:
writetable(data, ‘output.csv’);
This is incredibly useful for machine learning and data analysis.
12. Step 10: Debugging and Troubleshooting
MATLAB gives helpful error messages.
But here are common mistakes to avoid:
1. Missing parentheses
plot x, y → WRONG
plot(x, y) → RIGHT
2. Using the wrong file name
Function file name must match the function name.
3. Mixing row and column vectors
Always check your dimensions.
Debugging tools like breakpoints, the Editor, and the Command Window make error-fixing easy.
Complete Summary
By now, you’ve learned:
- How MATLAB works
- How to write commands
- Variables & arrays
- Matrices
- Scripts and functions
- Loops
- Conditionals
- Plotting
- Data import/export
- Debugging
That’s a full beginner foundation!
FAQs — Step by Step MATLAB Tutorials
1. How long does it take to learn MATLAB?
With consistent practice, 1–2 weeks is enough for basics.
2. Do I need programming experience?
Not at all—MATLAB is beginner-friendly.
3. Is MATLAB useful for machine learning?
Yes! It has built-in ML and Deep Learning toolboxes.
4. Can I use MATLAB for free?
You can use the trial version or choose Octave as a free alternative.
5. Is MATLAB better than Python?
Not better or worse—just different.
MATLAB is amazing for engineering and math-heavy tasks.
Conclusion
Learning MATLAB becomes much easier when you follow step by step MATLAB tutorials that guide you through each concept in a simple, practical way. With the basics you’ve covered—variables, scripts, functions, loops, matrices, and plotting—you now have a solid foundation to explore more advanced features confidently.
Keep practicing, experimenting, and building small projects, and you’ll see your skills grow quickly. Whenever you need clarity, return to these steps and continue learning at your own pace.